Pairing your Lightspeed POS with Tyro
Before you begin
Setting up the integration to take EFTPOS payments is easy - you will want to have your account set up and the EFTPOS terminal(s) on site before attempting to integrate them and getting them talking. You will also need;
- Your POS terminal on hand and the Kounta App is installed
- If you need any help with installing the Kounta POS App, check out this guide
- Stable internet connection
Enable the Tyro Integration
1. From the Add-ons Page in Kounta back office, find the Tyro add-on
2. Enable this add-on by selecting the orange Enable Tyro button

Pair your Tyro terminal with your Kounta POS
1. Head to the Kounta POS screen
2. From the menu button (top left) select Add-ons
Note - the elegant & power-saving dark mode is now available on Kounta POS. Check out this guide on how you can activate it.
3. Select the Pair Tyro Device option

4. On your Tyro Device
Pro Tip -Preparing the Tyro device may differ from terminal to terminal - follow the prompts on the Kounta POS if you are unsure
If you are using this guide then you can also skip to the I know what I'm doing link and follow the below steps

4.1 Enter the Tyro Device's Menu
4.2 Select Configuration
4.3 Select Integrated EFTPOS
4.4 Enter your Admin Password. This will have been set up when this device was activated
4.5 Select Pair with POS
4.6 You will now see your Merchant ID and Terminal ID note these down for now. Do not select Start yet.

5. Back on your Kounta POS
5.1 Enter your Merchant ID (MID) and Terminal ID (TID)

6. Select Authorise on the Kounta POS Screen (Blue Button)
7. Select Start on the Tyro device

Pro Tip -If you hit any snags during the pairing process you can clear existing pairings on the Tyro Device (Menu -> Integrated EFTPOS -> [admin password] -> Clear Pairings)
Process a Sale with Tyro on Kounta POS
Processing a sale with an integrated EFTPOS like Tyro is easy and is covered in our guide on Processing Sales with Kounta POS
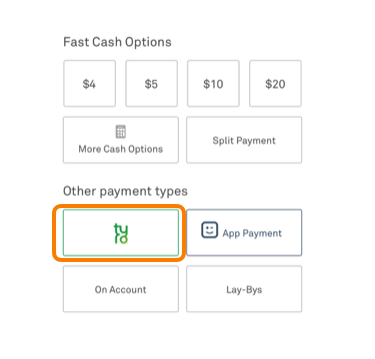
For a quick reference - all you need to do is select the Tyro logo from the Checkout panel

Related Articles
How to Pair Tyro
Open Restaurant App Click on add-on's Select Pair Tyro Select the type of terminal image in use in the business Go to Tyro terminal Scroll to Configuration and hit Enter Enter you pin code (if requested) Click on Integrated eftpos Click on Pair tyro ...Smart Pay Integration with Lightspeed POS
Hey, Here's the guide below on how to pair Smart Pay + Kounta together. Integrate your Kounta POS with Smartpay (Australia & NZ) Smartpay has a native integration with Kounta POS to provide a faster, more secure and accurate workflow to process ...Lightspeed App Printing
Choosing a printer The Lightspeed App printing method allows your iPad or Android Tablet/ Mobile to communicate directly with compatible Epson or Star (iPad App only) ethernet printers. Epson TM-M30 Ethernet TM-T82II Ethernet TM-T82III Ethernet ...Redeeming Gift-IT gift vouchers in Lightspeed Retail
Currently Lightspeed Retail and Gift-IT are not integrated however there is a simple process for redeeming vouchers on the Lightspeed Retail POS and via the Gift-IT portal that you can follow. After a Gift Voucher is sold, the customer comes in and ...Yoom - How to Sync Menu from Lightspeed Online Products
To manage your menu in Lightspeed Online Products, please follow this guide. Once you are happy with the preview in Lightspeed Online Products, you can sync these changes by following these steps. 1. Login to the Yoom Dashboard ...