Selling with Account Sales
Enable Accounts Add-On
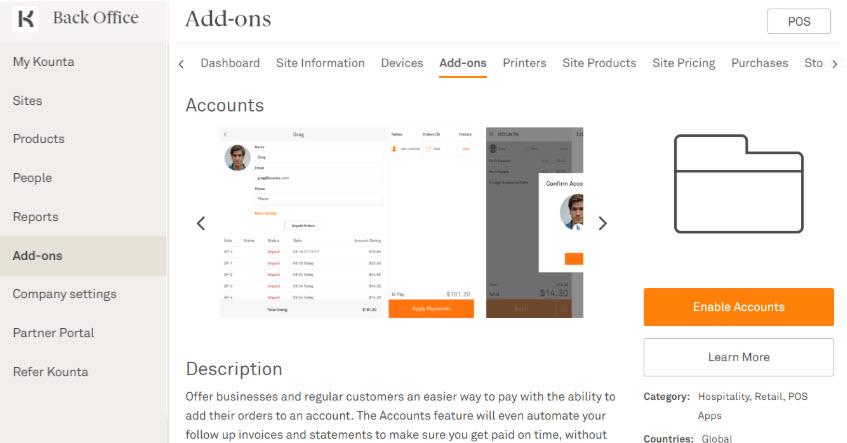
1. From the Add-ons Page in Kounta back office, find the Accounts add-on
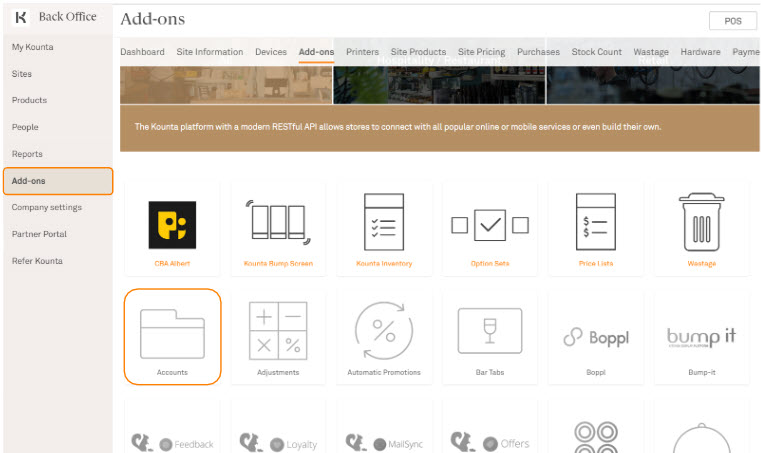
2. Enable this Add-on by selecting the orange Enable Accounts button
Place an order on Account
1. From the POS - Place your order as normal
2. Select Check Out & choose On Account
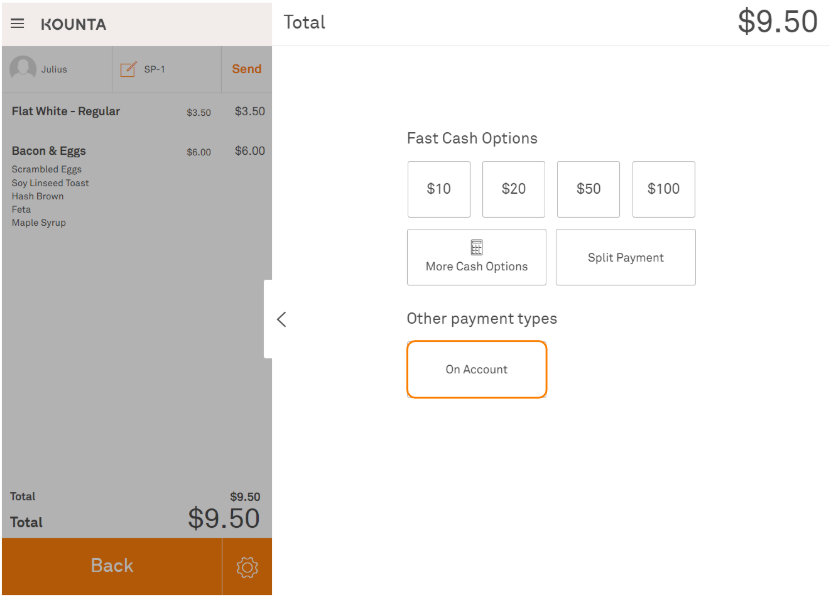
3. You will be prompted to choose the account - Simply search & select the customer or add a new customer.

Note - Customers can be added from the Back Office or from the Point of Sale
4. Once the customer information is entered, select Save
5. You will now be prompted to confirm the account identity which will allow you to decide to allow this customer to have an account (if they have one already, you will see their current balance.)
Select Yes to proceed.
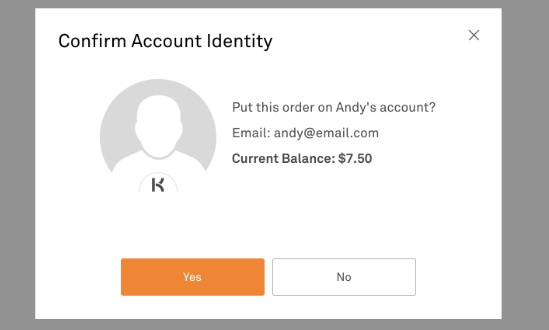
This order has now been charged to this account. You will only be able to review and pay off the transaction (or send statements and invoices)
Process payments and manage Accounts
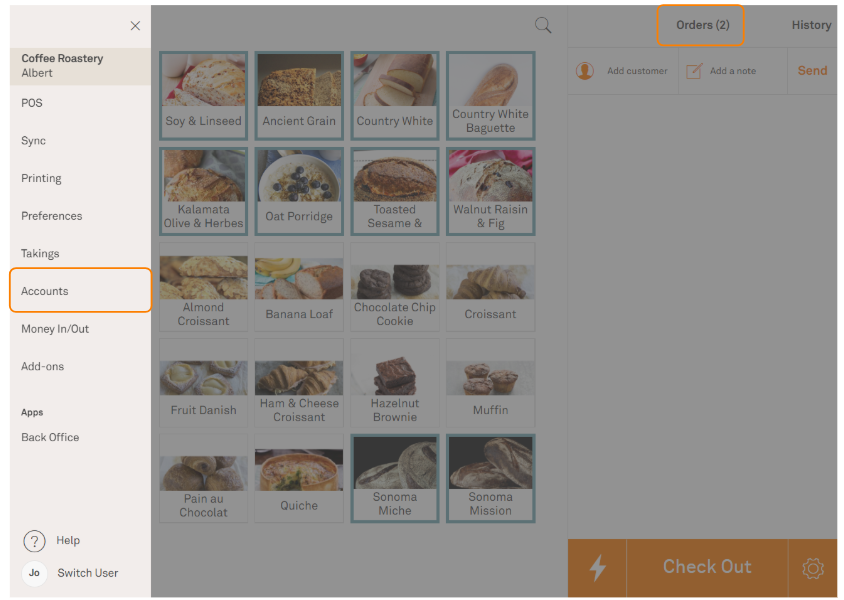
1. On your POS, select the menu icon on the top left corner
2. Select Accounts
Pro Tip - Alternatively, you can access Accounts by finding it under Orders
3. Select the account you’d like to process payment for
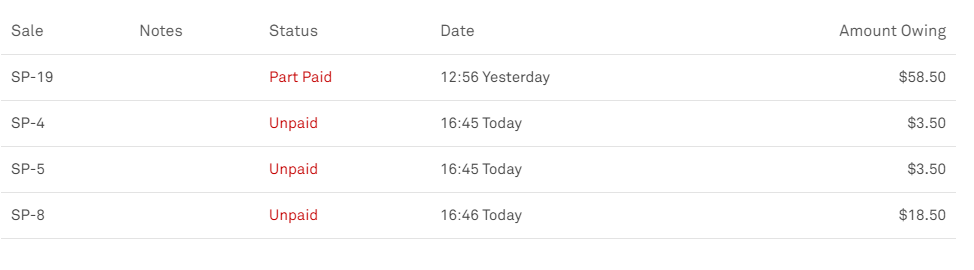
4. You will then see the account summary
5. Select Apply Payments
6. Checkout as normal
Note -If you process partial payments, it will show on the account summary as Part Paid.
Configure Accounts in Back Office
1. From Sites in the Back Office, select Site Information
2. This first setting is for sending the invoice to your customer’s email.
Under “Receipt options,” look for Send receipts to customers via email to choose which option suits you best.
Under “Receipt options,” look for Send receipts to customers via email to choose which option suits you best.

3. Select Save
4. Next, we will configure the account statement and invoice. From the Back Office, select Add-ons (If you have more than one Site, you will be prompted to select which one)
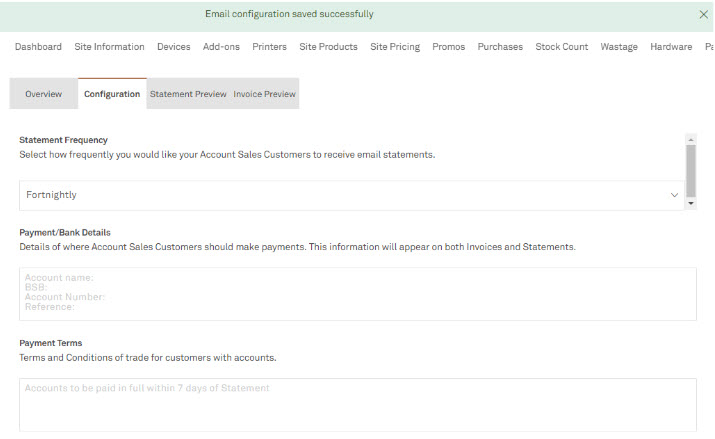
5. Select Accounts then select Configuration
6. Fill in the fields:
- Statement Frequency: Choose the schedule of auto-sending account statements to your customers. The Statements are summaries of the pending balances of each account.
- Payment/Bank Details: Indicate your bank details so customers can pay via transfers or direct deposit
- Payment Terms: Use this as a reminder of payment terms such as when and how the payment needs to be settled
- Payment/Bank Details: Indicate your bank details so customers can pay via transfers or direct deposit
- Payment Terms: Use this as a reminder of payment terms such as when and how the payment needs to be settled
7. This should save automatically
8. After this, select Statement Preview and Invoice Preview to check the layout of your the statement and invoice that you will send.
Related Articles
Schedule an Automatic Sales Report via Email
If you’d like to receive a daily summary of your sales via email, you can schedule a sales report directly from the POS back office. This allows you to review your daily performance without needing to manually generate the report each time. Follow ...Selling with Bar Tabs
Before you begin For Bar Tabs to work, you’d need to have either Tyro or Blackline. Enable the Bar Tabs add-on 1. From the Add-ons Page in Kounta Back Office, find the Bar Tabs add-on 2. Enable this Add-on by clicking on the orange Enable Bar ...How to downgrade your Kounta account
Downgrade My Kounta account 1. Head to the Account page 2. Select your Company 3. Select the site you wish to downgrade by selecting its settings cogwheel (on the right) 4. Select " Downgrade " under the Change Plan heading 5. Select the plan you ...Transfer of Kounta account ownership
Transfer site ownership Note - The new owner must already have accepted an invitation to the site and given admin access 1. Under My Kounta from the Back Office, select Subscriptions 2. If you have more than one site, you will be prompted to ...Running an account for your regular customers
Hey, Here is a video on how to manage ACCOUNTS for your regular customers. If you have any further questions, please email our team on support@innovatorsdirect.com.au for more information. Cheers,