Setting up Production Printing (aka Kitchen Printing)
Before you begin
Naturally, before we set up production printing you will need to have set up your printers or set up your Bump Screen.
Note: Bump Screens are the digitized version of kitchen printing. When you enable the Bump Screen addon it will create a printer profile for you to set up with production printing - just like you would with your physical printer.
Once you have connected your printers to Kounta, you can now choose how you want to organise your production printing across all your printers:
All items to all printers
All printers print will print the same production docket with all products
All printers print will print the same production docket with all products
Printer/Item Specific
Different printers have specific products assigned to print.
i.e., A piccolo latte will only be sent to the Barista Printer while the hamburger will only be sent to the kitchen printer.
Different printers have specific products assigned to print.
i.e., A piccolo latte will only be sent to the Barista Printer while the hamburger will only be sent to the kitchen printer.
Split or Duplicate Production Printing
Great workaround for when you have just one printer (or multiple printers) - you can print multiple dockets from one printer - these can be either identical or different - completely up to you.
Great workaround for when you have just one printer (or multiple printers) - you can print multiple dockets from one printer - these can be either identical or different - completely up to you.
First, access the production printer settings.
1. From Back Office, select Sites
(If you have more than one site, you will be prompted to choose which one)
(If you have more than one site, you will be prompted to choose which one)
2. Select Printers

All items to All printers
All printers print the same order docket; products are all printed and not assigned.
Perform step 1 and 2 to access the production printer settings.
3. Under Production Printing, select All Items to All Printers

Printer/Item Specific
Different printers have specific products assigned to print.
i.e., A piccolo latte will only be sent to the Barista Printer while the hamburger will only be sent to the kitchen printer.
i.e., A piccolo latte will only be sent to the Barista Printer while the hamburger will only be sent to the kitchen printer.
Perform step 1 and 2 to access the production printer settings.
3. Under Production Printing, select Printer/Item Specific

4. Select Save
You need to select the Save button to show the Assign products button in the next steps.
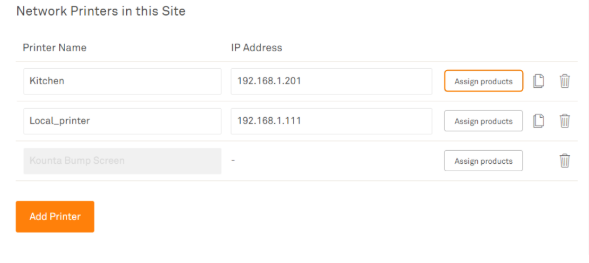
5. Now we can assign products to each printer. On the same page, scroll down to Network Printers in this Site
6. The printers that you have set up in your system will show here. Select Assign products
7. You will see a list of all your categories and products. Tick the categories/products that you want this printer to print.
 Blank box = the product or category is not assigned to the printer.
 Tick = the product or an entire category is assigned to the printer.
 Dash = only some products in the category are selected.
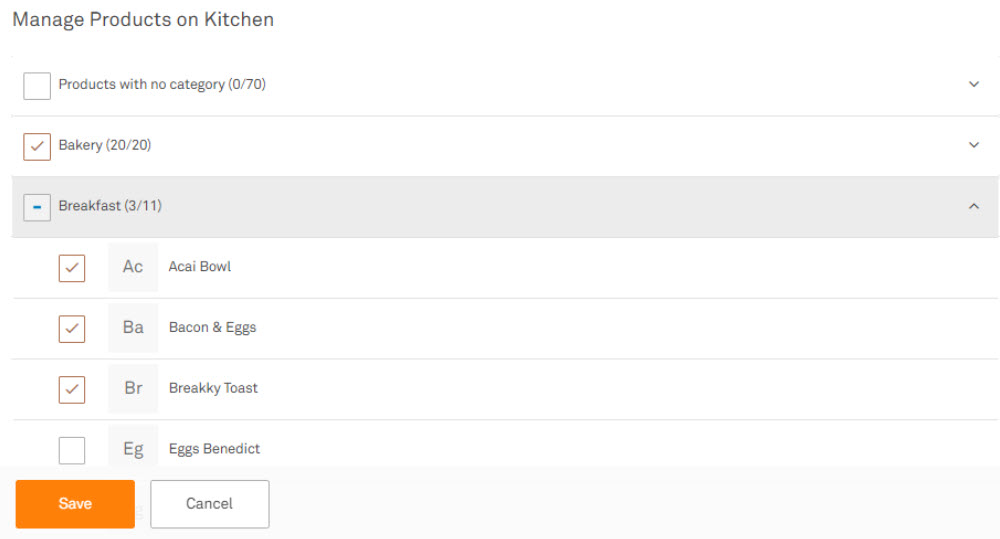
8. Select Save
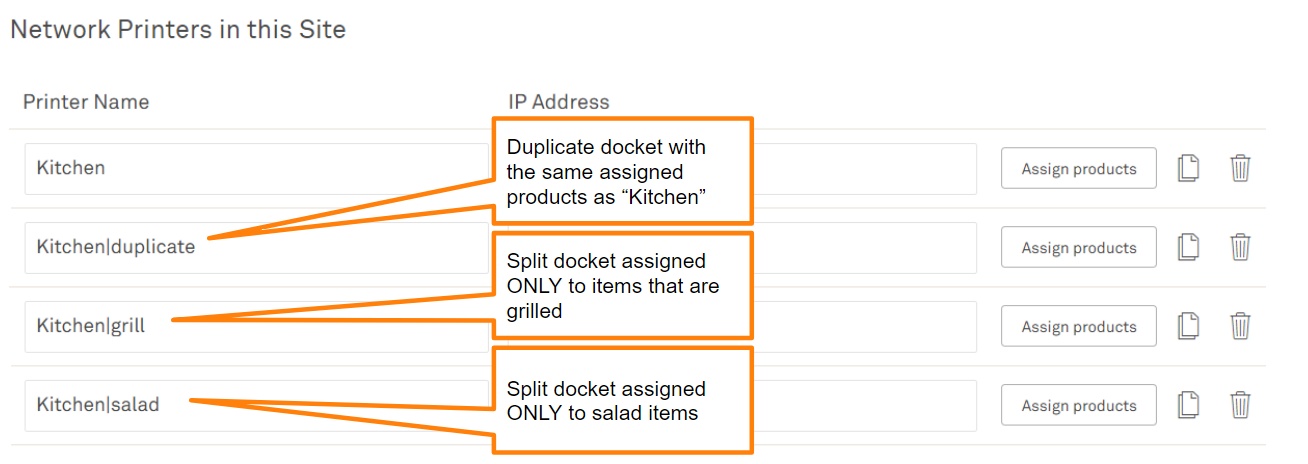
Split or Duplicate Production Docket
Great workaround for when you have just one printer (or multiple printers) - you can print multiple dockets from one printer - these can be either identical or different - completely up to you.
By setting up split dockets, you can print out order dockets for the grill station and for the salad station - all from one printer.
Perform step 1 and 2 to access the production printer settings.
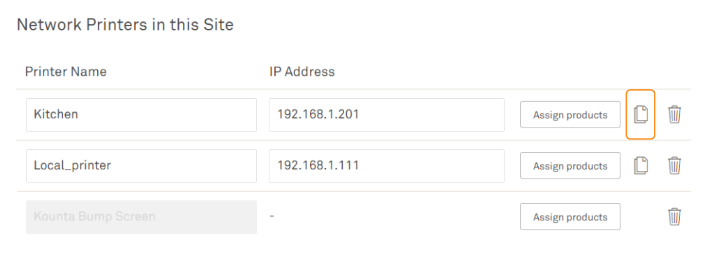
3. To duplicate a printer, select the copy icon beside that printer.
4. You will be prompted to give this printer a name (so that you don’t confuse it with the original) - we recommend that you give it a name for the station that it will print dockets (e.g. Kitchen-Salad and Kitchen-Grill)
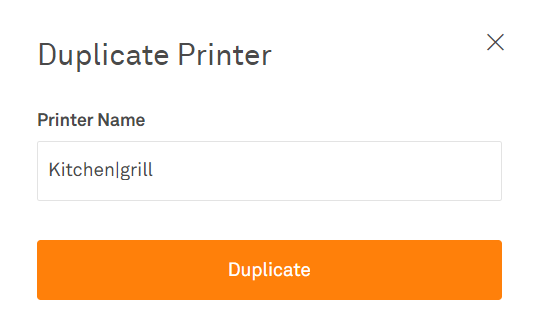
5. And select Duplicate to confirm
Rename the duplicate with the same printer name as on the Intelligent Printer Server followed by a pipe symbol | and a label (e.g. Kitchen|food or local_printer|kitchen)
6. To split these dockets so that they print different products, you can follow the steps above to assign printer specific products.
Related Articles
Intelligent Printing - Choose and Setup Hardware
If you’re reading this, you’re looking to set-up Intelligent printing, because your Kounta site is using one or more Windows, Mac, or Albert devices at the POS. The Epson TMi Intelligent Printer will allow you to immediately print receipts, pop ...Lightspeed App Printing
Choosing a printer The Lightspeed App printing method allows your iPad or Android Tablet/ Mobile to communicate directly with compatible Epson or Star (iPad App only) ethernet printers. Epson TM-M30 Ethernet TM-T82II Ethernet TM-T82III Ethernet ...Register Information & Printing Settings
Register Information This is where you would need to go for basic settings on how your register works - such as name, status, and workflow. 1. Under Sites from the Kounta Back Office, select Devices 2. Select cog icon beside the name of the register ...Setting up an Epson m30 Bluetooth Printer with Kounta
Before you begin Note - You’ll need to make sure that you have the Bluetooth version of the TM-M30 as there are some models of this printer that are not Bluetooth and they look nearly identical. You can confirm that your printer is Bluetooth-capable ...How to search for printers in Kounta
Connect printers to your Kounta POS 1. Head on over to your POS on the Kounta App 2. From menu, select Printing 3. The system should immediately start searching for your printers - hang tight. If not, select Search for Printers Again 4. This will ...