Setting up Recurring Purchase Orders
Before you begin
You will need:
- Kounta Purchase enabled from Back Office - with an Advanced Kounta Purchase plan
- Have your suppliers added in Kounta
- Follow along with the guides linked above before proceeding to the next steps 😉
Create and schedule recurring order
1. Launch Kounta Purchase from the Back Office
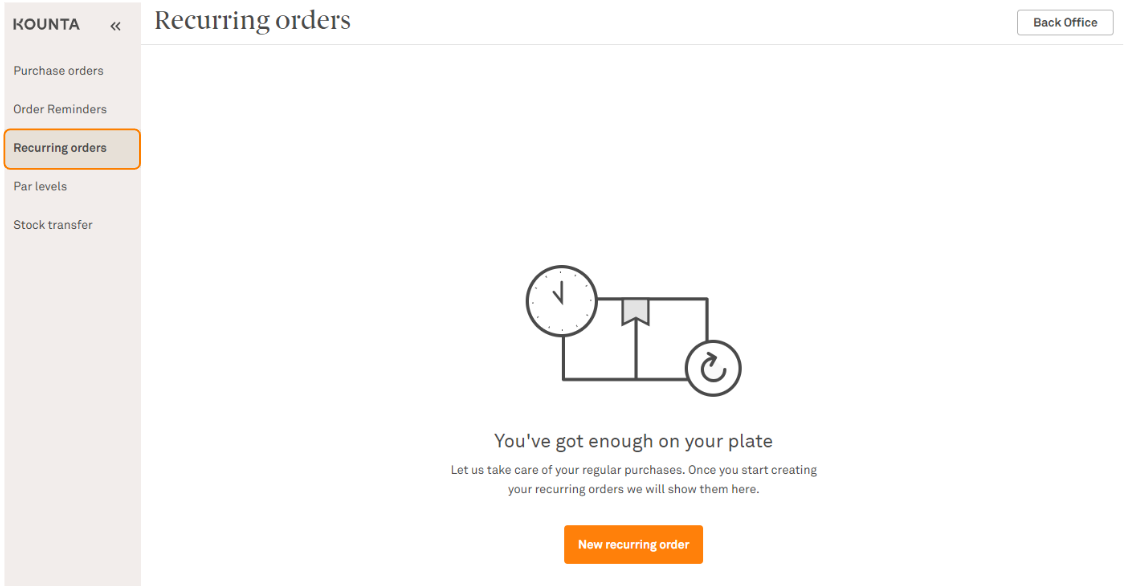
2. From the side menu on the left, select Recurring orders - then select New recurring order
3. Select a supplier from your list of added suppliers.
4. Select a category to see the assigned products to the supplier. You can also use the search bar to look for any category or product.

5. You can now enter the quantity of the stock you would need to order. Below, you will see a description of the other fields you can tweak.
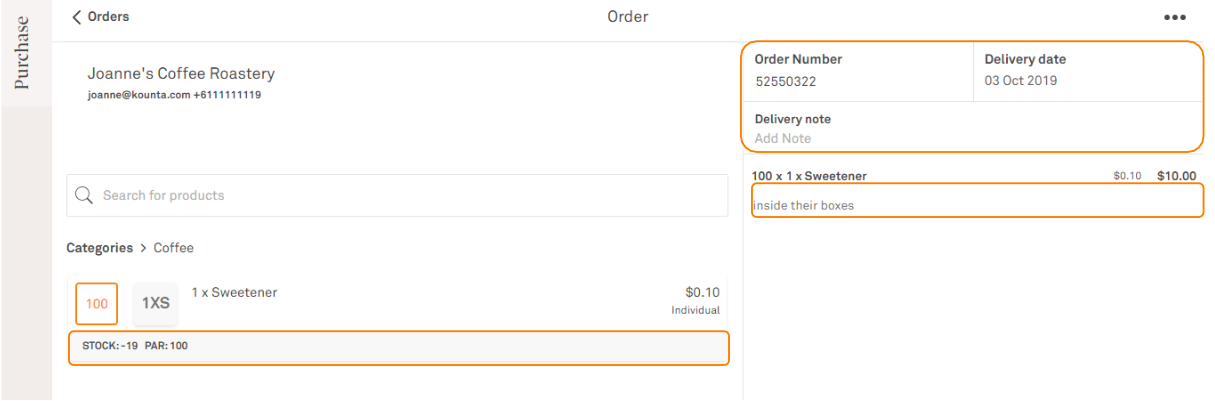
Stock & Par - Below each item, you will see your stock level and par level. Your stock level is updated based on your inventory settings. As for the Par level, you need to first set up your par level for a number to appear here. A dash will appear if this is not set.
Order Number - Kounta generates this automatically.
Delivery Date - The default date here will be tomorrow.
Delivery Note - Here's where you can jot down more specifications about your order.
Order Note (below product line) - In the image above, there’s an order note saying “inside their boxes” - this was added by selecting the product and entering this on the Note field.
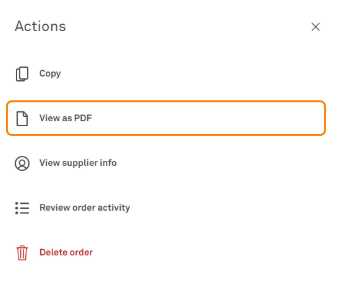
6. If you would like to review the PDF of this purchase order, select the menu icon (three dots) on the upper right corner of the screen. Then, select View as PDF
Note - Make sure to complete your supplier’s details and your own business details so that the fields auto-populate on the pdf.
7. Once you are happy with your recurring order, select Schedule on the lower right side of the page where you are editing the order.
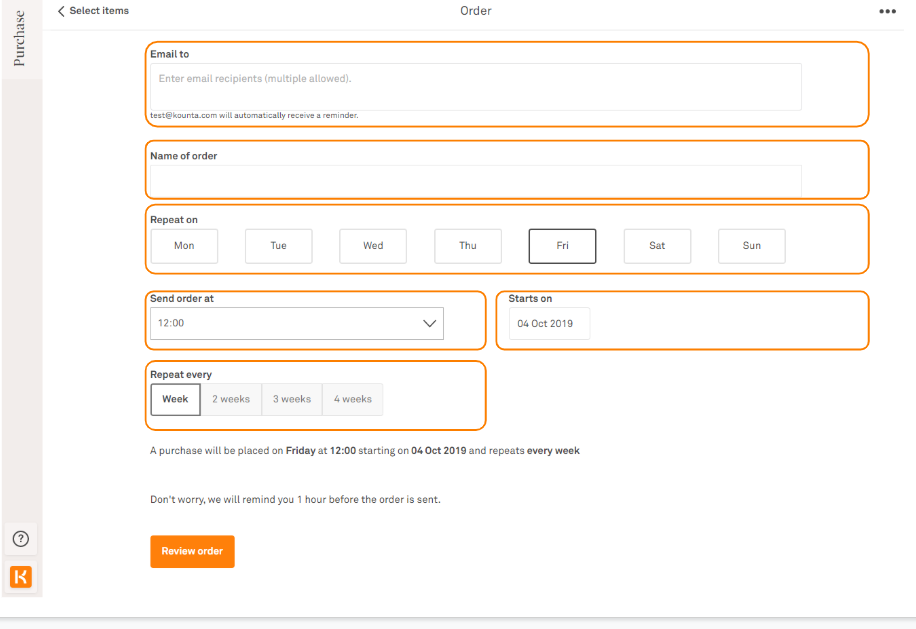
8. You will then be taken to this page where you can enter the following details about your recurring order:
Email to - use this field to enter the email/s to which the recurring order will be sent.
Note - the site owner is automatically included as a recipient of the order.
Note - the site owner is automatically included as a recipient of the order.
Name of order - choose a name to easily recognise this recurring order in the future.
Repeat on - choose the day/s of the weeks when this recurring order will be sent.
Send order at - choose a time when the order will be sent.
Starts on - choose a starting date for this recurring order.
Repeat every - choose the frequency by which the order will be sent on the selected day of the week. Could be weekly; or every 2, 3, or 4 weeks.
Note - You will be reminded one hour before an automatic order is sent.
8. Select Review order
9. Make sure everything is all set - then select Save
The recurring order is created!
You can edit the Recurring order template completely from the Recurring orders page. After you have finalised the recurring order, you can adjust the drafts it will generate from the Purchase orders page.
Note - The draft from a recurring order template generates at 1:00AM on the morning of the it will be sent to the supplier. As long as the order is a “draft” and not yet “placed”, you can edit it.
Related Articles
Sync Purchase Orders to QuickBooks
Before you begin Before you start connecting your QuickBooks account to Kounta, you'll want to make sure your QuickBooks account set up - you may need to double check this with your Accountant, or Bookkeeper. From here you can then you'll need to ...Sync Purchase Orders to Xero
Before you begin Before you start connecting your Xero account to Kounta, you'll want to make sure your Xero account set up - you may need to double check this with your Accountant, or Bookkeeper. From here you can then you'll need to enable ...Sync Purchase Orders to MYOB AccountRight Live
Before you begin Before you start connecting your MYOB account to Kounta, you'll want to make sure your MYOB AccountRight account set up - you may need to double check this with your Accountant, or Bookkeeper. From here you can then you'll need to ...Accessing Recommended Orders
Before you begin You will need: - Have Kounta Purchase enabled from the Back Office. The site must be subscribed to Purchase Advanced. - Have your suppliers added in Kounta & default items added under your suppliers. - Have your PAR levels added ...Setting up PAR Levels
Before you begin You will need to have enabled Purchase for this feature. Setup PAR level per product 1. Launch Purchase from the Back Office 2. From the side menu on the left, select Par levels 3. Use the search bar to look for products 4. ...